Tomorrow is the Sidewalk Sale at Homestead Handcrafts on Blanco!! 9-5, come early to get the best deals. Here's what I will have there:
Friday, September 27, 2013
Tuesday, August 27, 2013
Tin Topped Farmhouse Table
I'm writing this post mainly to dispel the possible idea of me knowing exactly what I'm doing, a serene vision of productivity.
It all started with me and Stefanie, Crystal, and Debbie scavenging through Stefanie's barns. Stefanie and Debbie had fun for about 2 hours, then they were out. Crystal and I continued for quite awhile longer, and had such fun rummaging through decades of forgotten bits of farm life. I found a cool old piece of tin in a turkey barn loft and decided to make a table to fit under it.
I had already run across Ana White's website (awesome!!) and I picked out a plan. Now, the plan was for a slightly bigger size, so I had to shrink it down. This entailed such math skills that I could feel Mr. Kalich and Mrs. Krnavek shaking their heads at me. Finally I got it figured out and built, but I was so nervous about the drawer I just did a false front.
halfway done:
my helpers:
I had to run to Home Depot 3 different times for this project, each time with 3 urchins.
The bottom was supposed to look like this:
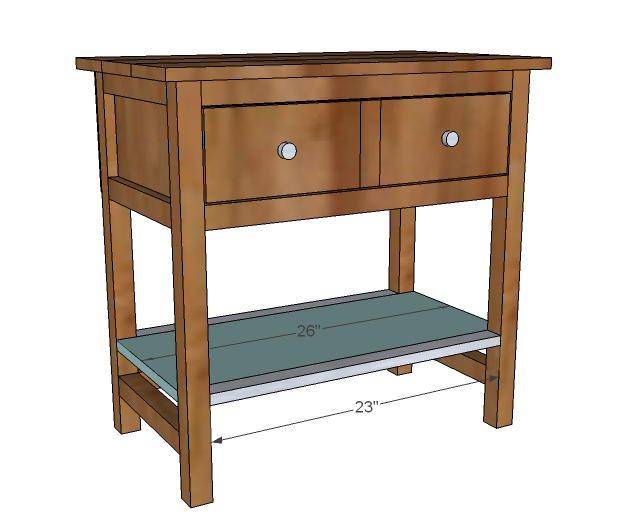
I finally, after about 2 hours of trying to figure it out with various widths and combinations of wood (because I was NOT going back to Home Depot for one.more.thing), gave up and put slats on it. Notice the two liquids on top. One is vinegar and steel wool, one is black tea. I figured that I would pickle and stain it before painting, since I was painting with milk paint, which don't adhere great and would flake off nicely in parts exposing the dark wood. So I did. And then I painted. And the paint stuck. I had to sand to distress, down to bare wood, so then I swiped the whole thing with a Minwax stain. Good grief. This project was now 5 days in the making.
And what are my children doing all this time? Blake and Seth are pretty decent, but Cullen is trying to ruin us all at the moment, so that means he could not be unsupervised for one second. So if I worked on it during the day, Cullen was right there playing on my phone, creating art like below, and serving me up a bevy of pretend food. I cannot tell you how many pretend pizzas, muffins, brownies, and fish that workshop has seen. All of which must be carefully eaten and enjoyed. Which I gladly do.
See those decorative vertical cuts on the front? My awesome new saw did that. I can adjust how far down the blade can go and make cool decorative cuts. I'm in love.
It all started with me and Stefanie, Crystal, and Debbie scavenging through Stefanie's barns. Stefanie and Debbie had fun for about 2 hours, then they were out. Crystal and I continued for quite awhile longer, and had such fun rummaging through decades of forgotten bits of farm life. I found a cool old piece of tin in a turkey barn loft and decided to make a table to fit under it.
I had already run across Ana White's website (awesome!!) and I picked out a plan. Now, the plan was for a slightly bigger size, so I had to shrink it down. This entailed such math skills that I could feel Mr. Kalich and Mrs. Krnavek shaking their heads at me. Finally I got it figured out and built, but I was so nervous about the drawer I just did a false front.
halfway done:
my helpers:
I had to run to Home Depot 3 different times for this project, each time with 3 urchins.
The bottom was supposed to look like this:

I finally, after about 2 hours of trying to figure it out with various widths and combinations of wood (because I was NOT going back to Home Depot for one.more.thing), gave up and put slats on it. Notice the two liquids on top. One is vinegar and steel wool, one is black tea. I figured that I would pickle and stain it before painting, since I was painting with milk paint, which don't adhere great and would flake off nicely in parts exposing the dark wood. So I did. And then I painted. And the paint stuck. I had to sand to distress, down to bare wood, so then I swiped the whole thing with a Minwax stain. Good grief. This project was now 5 days in the making.
And what are my children doing all this time? Blake and Seth are pretty decent, but Cullen is trying to ruin us all at the moment, so that means he could not be unsupervised for one second. So if I worked on it during the day, Cullen was right there playing on my phone, creating art like below, and serving me up a bevy of pretend food. I cannot tell you how many pretend pizzas, muffins, brownies, and fish that workshop has seen. All of which must be carefully eaten and enjoyed. Which I gladly do.
The metal on top is easily twice as thick as what you would normally hammer on top, so I used liquid nails, and carpet tacks on the edges, and a ton of hammering the edges down! I was incredibly sore the next day. So to sum up, if I did the exact project again it would take me half the time. I did learn a ton and I love the final product. If I had room to put it anywhere, I probably wouldn't have sold it!
See those decorative vertical cuts on the front? My awesome new saw did that. I can adjust how far down the blade can go and make cool decorative cuts. I'm in love.
Saturday, August 17, 2013
From Toy Chest to Conversation Piece
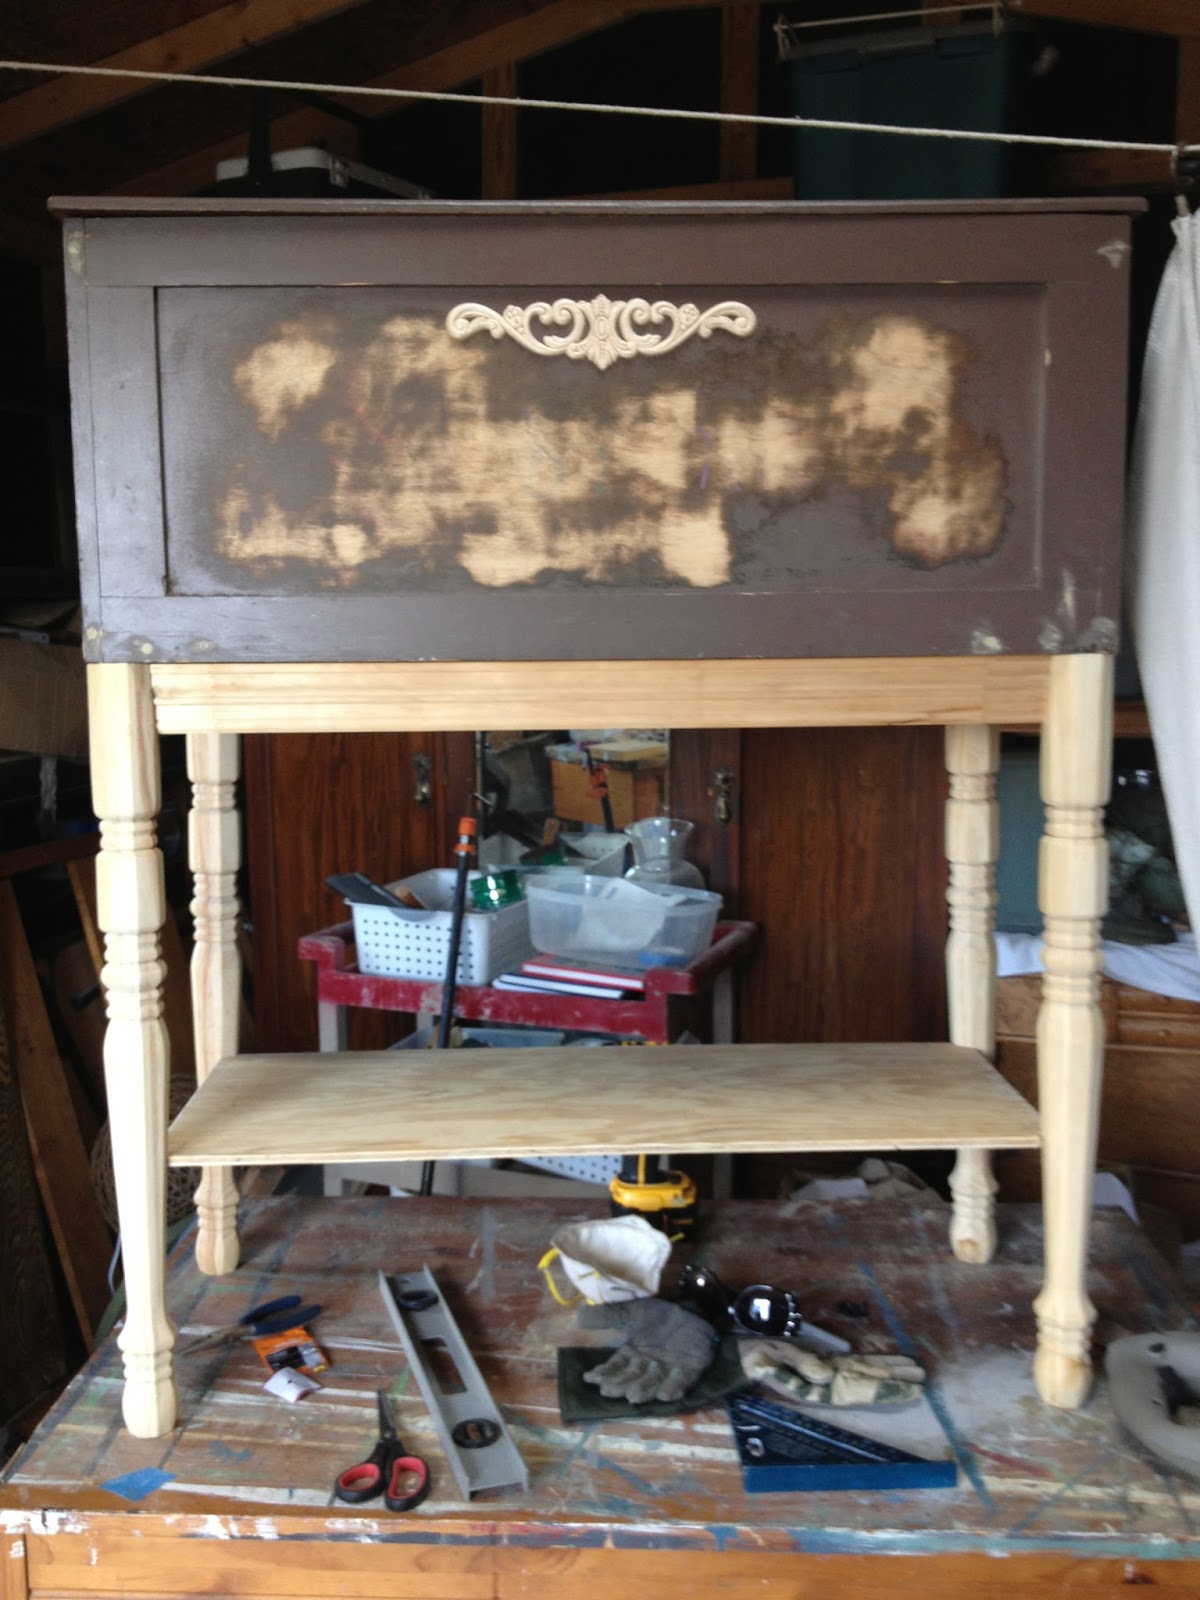
Someone from church just hired me to change the toy box they grew up with, a plain jane brown box on casters, into a conversation piece. I don't know what you would call it now, but it's cool. I glammed it up. She requested it to have legs, a shelf, and neutral colors. Here's the before:
Pretend like my workshop behind the chest looks all cutesy like it belongs on Pinterest...
It's easy to see the finished project and think I always know what I'm doing. So far from the truth, but I'm learning. For instance this time I learned that you really have to have bracing for legs if you can't add them underneath a lip to secure them to. I also learned that the way to attach bracing is with a kreg jig (thank you woodworking forums!) This is what it looks like and what it does:
Here's the cool way I attached the shelf: I screwed eye hooks into the legs, rested the shelf on them, and then screwed a short screw (plus a washer to make it even shorter) through the eye hook to hold it in place. Pretty nifty.
Once done with the construction part, I painted it Yound Kansas Wheat by Cece Caldwell, whitewashed it with Old White Annie Sloan, and wet distressed. This combo is a great way to keep it neutral but not boring. I finished with clear wax.
Here's the after:
It's easy to see the finished project and think I always know what I'm doing. So far from the truth, but I'm learning. For instance this time I learned that you really have to have bracing for legs if you can't add them underneath a lip to secure them to. I also learned that the way to attach bracing is with a kreg jig (thank you woodworking forums!) This is what it looks like and what it does:
Here's the cool way I attached the shelf: I screwed eye hooks into the legs, rested the shelf on them, and then screwed a short screw (plus a washer to make it even shorter) through the eye hook to hold it in place. Pretty nifty.
Once done with the construction part, I painted it Yound Kansas Wheat by Cece Caldwell, whitewashed it with Old White Annie Sloan, and wet distressed. This combo is a great way to keep it neutral but not boring. I finished with clear wax.
Here's the after:
Thursday, July 18, 2013
Casey's tables
Well, it's been awhile since I've posted. I've been enjoying the summer with my boys, with not much time to work on furniture. I committed to only taking 2 projects a month for the summer, and now I just have one project left!
I've done several things for Casey before and what I love about painting for her is 1: She's not afraid of color and 2: She tells me the color pallette and let's me be really creative with it. I just finished 3 tables for her, all with similar ranges of blue and green, but all 3 with different finishes.
Magazine table:
Cece caldwell's Virginia Chestnut topped with a wash of blue over it, wet distressed and clear waxed.
Hexagonal table:
Custom blue washed with green, distressed and topped with dark wax.
Square table:
Aubusson blue, washed with Antibes green and the French linen. Wet distressed and then clear wax. Love how it all layers up together!
I've done several things for Casey before and what I love about painting for her is 1: She's not afraid of color and 2: She tells me the color pallette and let's me be really creative with it. I just finished 3 tables for her, all with similar ranges of blue and green, but all 3 with different finishes.
Magazine table:
Cece caldwell's Virginia Chestnut topped with a wash of blue over it, wet distressed and clear waxed.
Hexagonal table:
Custom blue washed with green, distressed and topped with dark wax.
Square table:
Aubusson blue, washed with Antibes green and the French linen. Wet distressed and then clear wax. Love how it all layers up together!
Thursday, May 16, 2013
Aubusson Blue Sideboard Reveal
You might think, as I did when I first saw a text pic of it, that someone had already gone to the trouble of stripping it. Well, the drawers were stripped, but the rest was actually a faded orange paint covered in mildew, flaking off everywhere. And I discovered it was lead paint! You're really not supposed to sand that stuff. So I got to try something cool with the chalk paint for the first time. I scraped it as best I could and removed all the paint chips. Then, I left the lid off of a can of French Linen for 2 nights. It made it into a "gesso", kind of like stucco. I spackled it right on there to fill the ginormous holes left in the paint finish. It still took a couple of coats, but there's no way you could spackle with filler and then expect to distress it. It worked beautifully. The only down side is that it used a lot of paint. You can see the orange color better here:
The top decorative piece was so warped if one end was against the piece the other end was 4 inches away. I soaked it in my bathtub (Yay long bathtub!) 2 separate times and clamped it down to my work table. I wasn't sure if it would work, but it did!
I cut them off and Frankensteined new feet on. The back ones came from a table and the front round ones are bed spindles!
I also retacked the bottom on, it was sagging a bit:
Here's the end result: I am quite proud of how it turned out.
Subscribe to:
Posts (Atom)